- Manual/Specifications
- Manual
- Epilog Technical Specifications
- Materials List
- Bed Size—40" x 28 "x 14"
- How do I use the Laser system?
Prints are sent to the laser system from the Adobe Illustrator using the computer in the MakerSpace. Come by during the open hours and some one can help set up the machine and your file.
- File type
- Designing files for the Laser System
We send print jobs to the laser system from Adobe Illustrator. Saving your files as .ai is the best option although not always possible we can also print from .svg, .pdf and .jpeg files but do not have as much freedom to alter the file if needed. Cutting operations on the laser system require the ability to designate a line in your design with the stroke or thickness of .001", this is also referred to as a "hairline" in some programs. Lines with a stroke thicker than .001" can only be rastered (Engraved), and not run as a "vector line" for cutting.
- Files can be designed directly in Adobe Illustrator or in other CAD programs.
- When setting up a print we can also make basic adjustments like scaling objects and rearranging the print objects.
- Photos should be opened in Photo shop converted to a gray scale and a bitmap, adjust the brightness and contrast and then save as a bitmap file, .bmp.
- Using Adobe Illustrator
New accordion content
- Setting up the machine
New accordion content
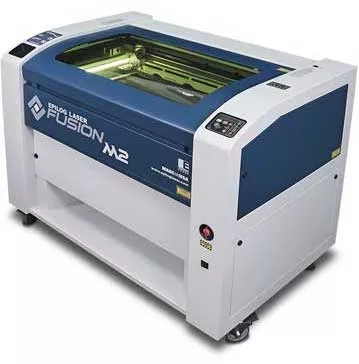
- Laser Cutter/Engraver—50 Watt Epilog Fusion M2 C02 Laser
The Fusion M2 is an accurate laser system capable of cutting materials like wood, acrylic, paper and fabric. It can also engrave on a variety of materials, see materials list for more information. Prints are sent to the laser system from Adobe Illustrator and can print from Ai files, pdfs, vector files and jpegs. Come with a file during the open hours and we can get you set up and printing.
Note: There is always a risk of fire when laser cutting or engraving. Users must receive fire safety training and remain present with the laser cutter at all times while in operation.
3D Printing
The Makerspace is equipped with three Ultimaker 3 model printers, two Ultimaker S5 printers, and one Markforged Onyx Pro. Typically files are either printed in PLA plastic on our Ultimaker brands, or a proprietary Onyx filament for stronger nylon-carbon blend parts that can be reinforced with fiber glass. Stop by the MakerSpace during open hours and someone can help you get a 3D print set up.
- How do I start printing?
Save your CAD files or model as a .stl, then save it to your drive or email it to yourself. Drop by the MakerSpace and from the MakerSpace computer we can then open the file in a slicing software and send it to print.
- What is 3D Printing
3D printing is a manufacturing process where plastic material is melted and laid down in many successive layers to create an object. To go from an idea to a final 3D printed product, you should follow three main steps:
Step 1 Modeling
3D modeling is the fun, creative and (at times) challenging process of designing objects in CAD (computer aided design) software.
A commonly used software for 3D modeling is Fusion 360 by Autodesk, which is free for students and hobbyists. You can use your Swarthmore Credentials to gain Educational Access to Fusion 360. Our labs are also equipped with Rhino, a robust NERBS modeling software, and open source softwares such as Blender and Meshmixer.
You can find many free, user-friendly software online or more sophisticated programs on computers located in the Media Center. You can also find many pre-designed 3D models online
To print models in the MakerSpace please save files as .stl and save them to your drive or email.
Step 2 Slicing
Now that you have your .stl file, you are ready to “slice” your model! In order for the 3D printer to know what to print, it needs to be given layer-by-layer instructions. These instructions are compiled into a file called a .gcode!
To get the .gcode, you must run your model through a “slicing” program. Our Ultimaker printers use a slicing software called Ultimaker Cura, while our Markforged model uses a browser-based software called Eiger.io. The Makerspace manager will have to add you as a user in Eiger.io before printing to the Markforged.
In the program you can adjust settings related to the layer height, support, scale or speed of your print.
Step 3 printing
With your .gcode saved, you are now ready to begin your print!
With some help from MakerSpace Technicians, you’ll need to select and calibrate the 3D printer. The Markforged sends prints over the network, while we use usb drives to start your print in our Ultimaker models. This will allow our tehcnicians to restart the print if there is an issue. Please leave your name and email address on a tag in the sleeve of the 3D printer, so we can label your print for pick up once it is complete. After this, you’ll have your very own 3D printed model.
- What is Slicing?
In order for the 3D printer to know what to print, it needs to be given layer-by-layer instructions which are compiled into a file called a .gcode. To get these instructions, you must run your 3D model through a “slicer.”
Step 1 Software
Once you have your .stl file ready, you need to upload it to slicing software associated with the 3D printer you will use:
Ultimaker 3 → Ultimaker Cura
Onyx Pro → Eiger Login (must be added as a user)
Next step is to choose some print settings!
Step 2 Settings
In the slicing software select the printer model you will be using, choose your filament type, layer height, infill and support.
- Filament Type: Most 3D prints made in the MakerSpace use PLA (Polylactic Acid), a biodegradable safe and user friendly plastic filament. We also have the ability to print in other filaments with varying characteristics.
- Layer Height can be thought of as the resolution of your 3D print. Typical layer heights range from .06 mm to .2 mm. Different layer heights achieve different aesthetics, and drastically effect the time your print takes to complete, as well as the amount of material your print uses.
- Infill is the structure that fills the inside of your 3D model. Density and pattern are two components of infill that affect your print’s weight and strength. Standard infill is a triangle pattern, which is very strong and efficient.
- Supports are structures meant to serve as under layers for parts of your model that “bridge” or “overhang.” Support material can be dissolvable or removable.
Step 3 print
Once you have finalized you settings and developed a .gcode you will check the printer. With help from a MakerSpace technician you will prep the build plate with a thin layer of glue and maker sure the correct filaments are loaded into the machine. Once the printer is all set you can save the .gcode to the usb thumb drive and plug it into the printer, or in the case of the Markforged, send it over the network. The .gcode file will download to the Markforged firmware and the printer will start printing!
- What printer should I use?
Printers:
Not all 3D printers are made equally! Knowing what makes each printer unique will help you choose which one to use. Here are some specifications of the printers available in the MakerSpace:
Ultimaker 3
Filament: PLA, PVA
Slicer: Cura
Build Area: 215 x 215 x 200 mm (7.75 x 7.75 x 7.25 in)
Additional Notes: Excellent for display models and semi- functional prototypes.Ultimaker S5 Filament: PLA, Nylon, PVA
Slicer: Cura
Build Area: 330 x 240 x 300 mm (13 x 9.4 x 11.8 inches)
Additional Notes: Excellent for display models and semi- functional prototypes.MarkForged Filament: Nylon/Carbon Fiber Composite, Fiberglass reinforcement
Slicer: Eiger.io Login
Build Area:
Width 320 mm Depth 132 mm Height 154 mm Or 12.5 x 5 x 6 in
Additional Notes: Specialized printer ideal for durable prototypes or functional parts that will be
subjected to physical strain (i.e. hinges, gears).
- Filament Types
PLA ABS (no longer available) Nylon Onyx Melting Temperature
Low
(180-220 °C)High
(210-240 °C)
High
(220-260 °C)
High
(275 °C)
Heated Bed Recommended
(20-60 °C)
Required
(80-110 °C)
Required
(70-110 °C)
Recommended
(70-110 °C)
Enclosure Optional
Required Recommended
(for large parts)
Recommended Ventilation Optional
Required
(hazardous fumes)
Optional Optional Strength Medium High High High Durability Medium High High High Flexibility Low Medium High High Shrinkage/Warping Minimal
Considerable Considerable Minimal Biodegradable Yes No No No
3D Scanning
- What is 3D Scanning?
Accordion content 1.
- How to use a 3D Scanner
Accordion content 2.